With the SARS-CoV-2 pandemic, the Zoom conference software gained significant popularity in 2020. With more and more events happening online, the demand for a better online experience grew. With a virtual camera and OBS for Zoom to control your picture, you can provide a better experience for all participants.
In real-life meetings, you, the organizer is in full control what and how your audience sees you. Online, the challenge is that all of your participants are using different devices to watch and listen to you. Even worse, in Zoom, your audience can adjust the layout of the screen.

The solution to this problem is to tell the participants to switch their Zoom to your image and set it to full screen. This way, you are in full control of what they are seeing. The problem here of course is that the only options Zoom provides you to control your own image is to select a camera.
The solution is to use a software to control your appearance, and have it act like a virtual camera. Instead of sending your camera picture directly to Zoom, you send it to this software which edits your image, and forwards that image to Zoom.
This way, you can, for example, show your main speakers (or singers) prominently and your other participants on the side–just like you would assign seats to the audience and to your speakers or singers on the stage.
Techniques to accomplish this have been around for years. It has been especially popular among role play gamers who streamed their games online. With some effort, you can not just assign positions of your participants on the screen, you can also add fancy borders and backgrounds to your video stream.

To accomplish that, we first need the Virtual Camera and OBS for Zoom:
- Download and Install Open Broadcaster Software OBS from here.
- If you are using Windows, make sure to also download and install the OBS virtual cam plugin installer from here.
- Start OBS.
- Click on Tools / VirtualCam and make sure the VirtualCam is running. For this, make sure “AutoStart” is selected and click on “Start” if possible.

Once started, the VirtualCam acts as a virtual camera you can use in Zoom. We shall now test whether the VirtualCam works:
- Start a new Zoom call: https://zoom.us/start/videomeeting
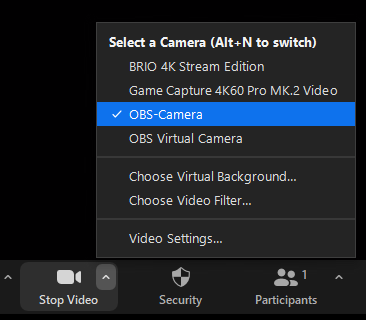
- Click on the arrow beside the video symbol and select “OBS-Camera”.

Now, Zoom shows the output of OBS. To test, let us connect our webcam to OBS:
- In OBS, click on “+” in the “Scenes” window in the bottom left corner.
- Let’s call the new scene “Main Scene” and press OK.
- Next, click on “+” in the “Sources” window at the bottom.
- Select “Video Capture Device”, select “Create new”, name the entry “Main Camera”, and press OK.
Congratulations, both Zoom and OBS should now show your happy face, and you are in full control of what other people see when they maximize your picture in Zoom.
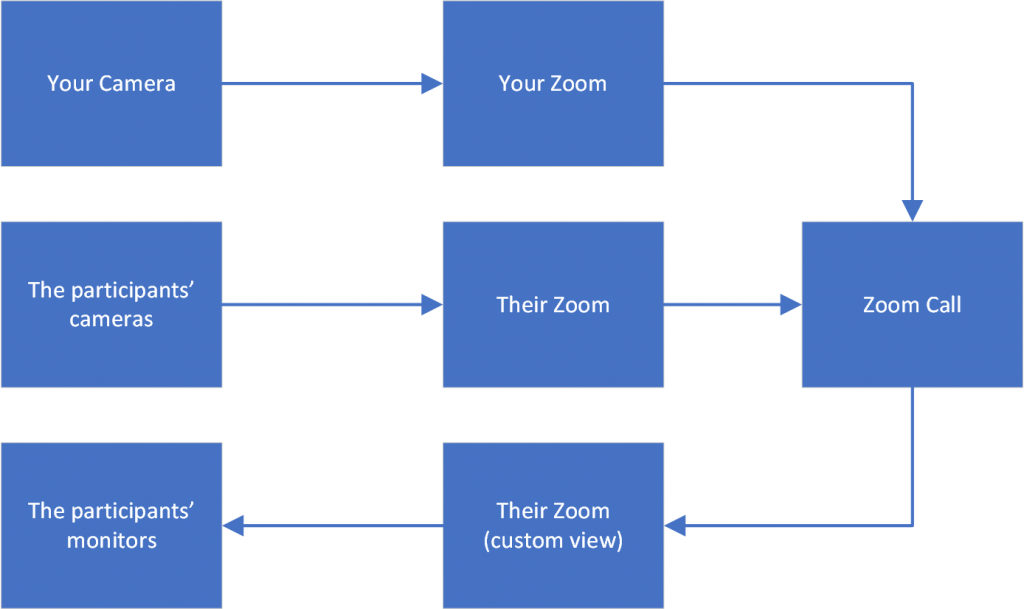
The next step is a bit tricky. You now want to show other participants as well. For this, you need to capture your Zoom window, and import it to OBS. Ideally, you have a second monitor exclusively for your Zoom meeting window, while controlling OBS on your main screen (or vice versa).
To illustrate, the process looks like this:

To show other participants as part of your image, you need to grab the screen from the Zoom window. For this, we need to add a separate “Window Capture” source for each participant.
- Click on “+”,
- select “Window Capture”,
- name the source, for example, “Participant 1”,
- select Zoom as the Window, and
- press OK.
Next, we want to add a filter to each of those sources to show only a certain part of the window. Select the source, right-click on it, select “Filters.” In the new window, click “+”, select “Crop/Pad”, and adjust the values for Left, Top, Right, and Bottom until only the participant in question is shown. Repeat this for every place in the gallery of pinned Zoom participants, and move each source to the right place in the OBS window.
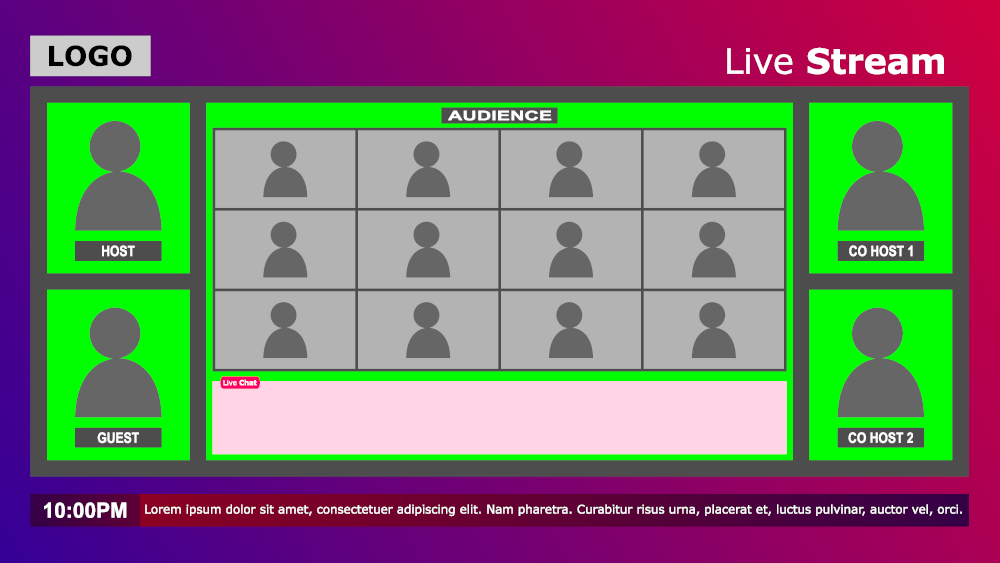
As a finishing touch, you could add a background image as an overlay. You can do this by clicking again “+”, select “Image” (or video, if you have one), and select the Overlay image. An overlay image has frames around the people participating in the call, for example:

That’s it!


